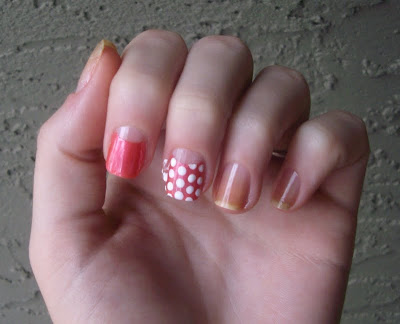
Today I have a floral nail tutorial for you along with how to do polka dots using a dotting tool. I am hoping to figure out how to do a video tutorial eventually. It's based off of this look:
You will need:
green polish, dotting tool (large end and small end), french tip guides (or tape or you can freehand), base/top coat and two polishes one being darker than the other. The darker one will also be your base polish in this tutorial but you could use something different if you'd like!
Note: I apologize that some pictures are blurry. I chose to do this indoors and my camera is awful indoors!
Polka Dot Nail
Step 1: Paint your nails with your clear base coat. Once they are dry, tape off your nails using the guides. You want just a little bit of your cuticle showing. I did one hand at a time but you could do both just to make sure they're even. These nail guides are GREAT. You can get them off Ebay for really cheap; I recommend it.
Step 2: Paint your taped off nails above the guide line. If you don't have guides, you can freehand this or try using tape but you want that arched look.
Step 4: Take off the tape. It's helpful to use a polish that doesn't take many coats for to be almost opaque because you want to try and take the tape off while the polish is still wet! If you have to do layer upon layer of polish, it will be more dry.
Step 5. Put some of your lighter coloured polish (I chose white) onto a piece of paper/plastic. Get out your larger dotting tool (or whatever size you want your polka dots to be).
Step 6. Do a line of dots up the center of your nail, starting on the coloured polish not the clear.
Step 6. Place a dot next to the first line so that it sits inbetween two, creating a diagonal line if you look at it sideways. This makes the dots look much more uniform!
Step 7. Continue with the dots, in lines, on either side of your nail. Remember to stagger them the best you can. Add your top coat and voila!
(please excuse the yellow stained nails!)
Floral Nail
Step 1. Drop some of your light polish onto a piece of paper. Now drop some dark polish (I used pink) next to it so that the colours overlap in the middle. You want to swirl them around a bit in the center so they create a third shade (keep it messy)...no picture of that. You will use your small dotting tool for this.
Step 2. To create the flowers, you want to do 5 small dots all together and then repeat that all over your nail (minus the clear part). I did 6 flowers here, each made up of 5 dots. Start by dipping your dotting tool in the middle shade for a dot or two, them pick up another shade and so on so that you get a nice mixture. You can go back over it with a few more dots. You don't want any bare spaces or for it to look like a perfect circle. It should be round but with bumps around it (like petals). Just do a dot and the continue doing them in a small circle so that they meet in the middle.
blurry but you can see the shape well
Step 3. Dab some green polish onto your paper and again use your small dotting tool. You are going to create leaves. I do two per flower and if there are any gaps on the nail I add a random leaf there. I do the leaves by doing a dot that I drag out a bit.
Step 4. Add a top coat and you're done!
I originally did the manicure using this colour. It did require more coats as it is a jelly so that's why I switched to something a bit more opaque for the tutorial. The bottle looks much lighter. This is the closest shade picture I could get (blurry indoors). I wish it didn't wear as red on the nail as it does. :( The bottle colour is really what I wanted. It is a jelly though so that's fun! This is Zoya "Maya".


I am loving this look! The whole tutorial has made me want to bust out the nail polish and give it a try. Thanks! - Katy
ReplyDeletethis is actually really amazing. i don't think i have the patience to try this, but i really wish i did. your nails look great! :)
ReplyDeleteAwesome nails!!!
ReplyDeleteMy blog
xoxo Michaela
Thanks for the great tutorial! Love, love, LOVE this design!
ReplyDeleteI'm so glad you did a tutorial on this. It's so pretty!!
ReplyDeleteturned out pretty!!
ReplyDeleteI love the little flowers soooo much!
ReplyDelete