Showing posts with label color club. Show all posts

Sunday, September 23, 2012

Wallis


First up, a Butter London! I ordered three colours and the matte topcoat from Coterie for only $11 using a $25 off coupon and free shipping!!! They are normally $14 each so that's an insane deal. This is Butter London "Wallis", one I've been wanting for a while. The formula was perfection and took two easy coats. I don't have any tipwear on day 2 so I think I'll keep this on until Sunday!

click to enlarge

Next we have Zoya Sookie. This is such a great traditional red, which is why I bought it. It's sort of a must have shade, I feel. Great formula and two coats. It's super super shiny even without topcoat. This one doesn't really like water so if you do dishes without gloves, be prepared for a few peeled chips. The accent finger is Julep "Oh Canada" which I hadn't worn yet since it arrived AFTER Canada Day. Grr. It has red and   colour shifting glitter in it in a clear base. I guess it's supposed to  be white and red glitter... I wish it was! But the "white' changes colour depending on the angle.

click to enlarge

 This was a fun one. The black is China Glaze "Liquid Leather". The white is Sinful Colors "Snow Me White". The neon is Sinful Colors "Neon Melon". The ring finger is Color Club "Revvvolution". It was inspired by one I saw on Tumblr but unfortunately it didn't say who it was by!

click to enlarge 

Thursday, August 9, 2012

Distressed Denim


Hot weather has arrived. Hello.

 
(jeans DIY/thrifted, top Target, shoes Old Navy, lipstick Wet n Wild Purty Permmision, hat Closet)

This mani didn't turn out as planned but I'm sharing it anyway. I did too many dots at the tips! I used Color Club "Blue-ming", "Sweet Pea", Blushing Rose" and Funky Fingers "Sand and Stilettos" for the dots. The base colour is Color Club "Hydrangea Kiss".


Sunday, June 24, 2012

Silver Linear Holo

I've definitely fallen behind on manicure pictures!  I am starting a fun blogger challenge tomorrow, just for one week. It was Lacquer Dreams' idea. We are to use our favourite polishes from each colour of the rainbow.  To add a twist, I'll be using those colours in nail art each time.  I'll have my first post (red) up tomorrow!

I have been lemming Color Club "Worth the Risque" for a while now and scored it on Copious for 1 penny recently!! Woo! It's a silver linear holo. This pictures do it no justice. It is MUCH more holo in person and I will try to get a better picture in the future.  This is two easy coats. No base or top coat required.  

This is when my nails were super short.  Lil nubbins. They grow pretty fast though.

shade

sun

indoors

 I also got Color Club "Ultra Violet" for a penny. Layering it over "Worth the Risque" looks cool! It really darkened the purple. It has a nice purple duochrome sheen to it. Color Club has become one of my favourite brands, for sure. Yes, they are vegan!


"Ultra Violet" on its own


Wednesday, July 20, 2011

revvvolution

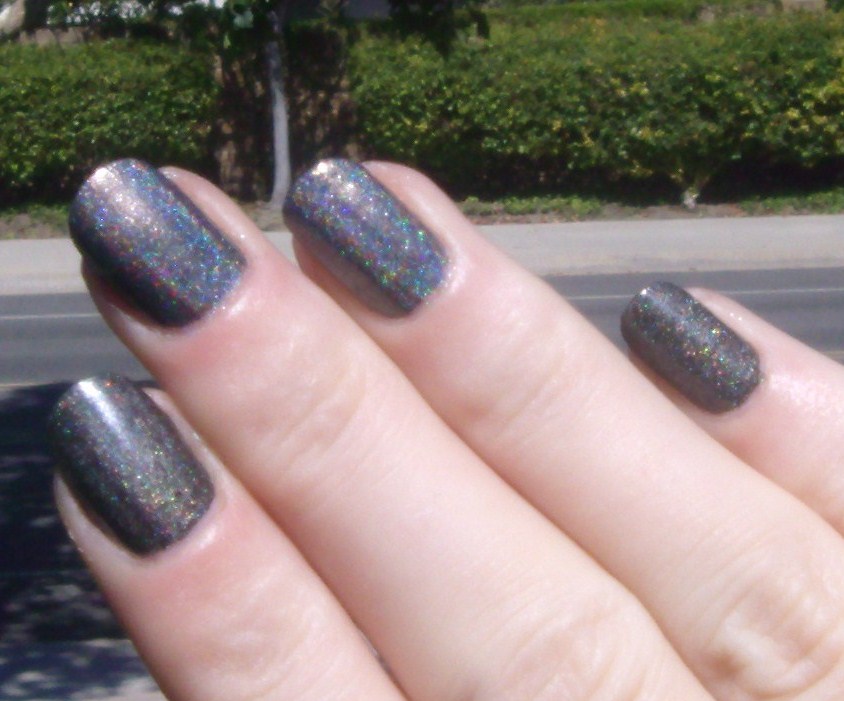
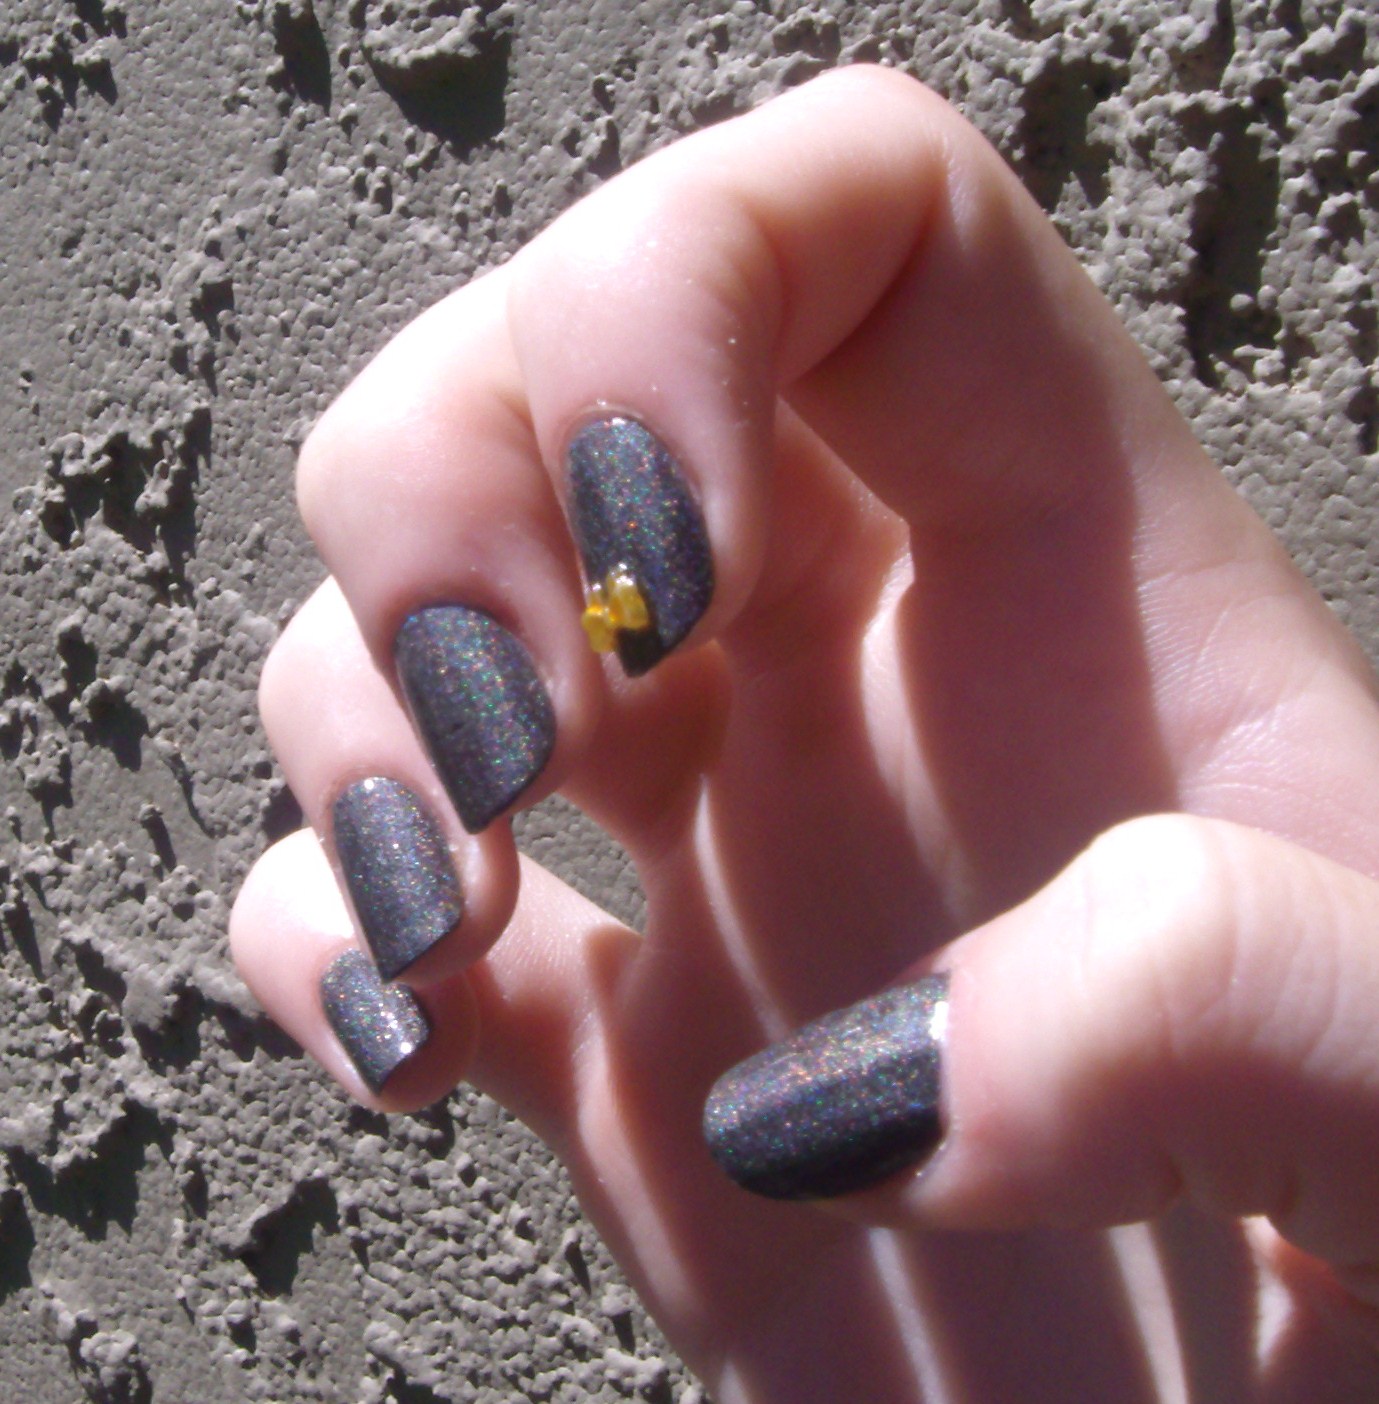
After all these girly manicures, I wanted to go with something darker. I decided to go with Color Club "Revvvolution" because the sun would show off the holo factor. So pretty.  

I lucked out with the fact that my "Revvvolution" is holo because there are two versions of it, old and new. The old is holo but the new one isn't. I ordered online, not knowing this, but thankfully mine is holo. So, if you order just be aware! Scrangie has a nice holo pic of it. I might shake my bottle more before I use it next time. I think some of the holo pigment may have settled down to the bottom.

I added "gLORIous" (holo top coat) to my middle and ring fingers to compare. It is a stronger linear holo with it. It's gorgeous but it takes away from how unique "Revvvolution" is plus is lightens ups the grey. It is gorgeous though, of course!


Ultimately, I painted over the "gLORIous" and just wore "Revvolution" on its own. I think it's a gorgeous polish. I like how the holo is more scattered and very golden. I prefer it with out topcoat but I wanted to add this cute bow so I had to add it.
before top coat
after top coat (darkens the polish a bit)


 Here you can see the holo a bit better.

 Then I added CC "Covered in Diamonds" which has multicoloured flakes of various sizes. It's so pretty. It reminds me of stained glass.


I discovered the macro shot after these pics were taken. It makes a huge difference though so my nail pictures will be much better in the future now that I can get all up close and personal.  Here's one I took (I was in the middle of taking off this mani)

Oh a note on these bows. I had them on for three days but they weren't budging so I'm sure they would have stayed on for a long time. For application, I dabbed some clear polish onto my nail then pressed the ribbon down onto it. Then I covered it and the entire nail with a coat of clear polish.  I removed it with remover.  I can actually re-use them but the remover took off the gold colour so now they are just clear, hehe.

LinkWithin

Related Posts Plugin for WordPress, Blogger...