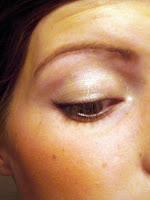
Did a picture tutorial. I thought about not posting it because the lighting is kind of awful (damn bathroom lighting) but what the hell. You get the general idea. I will make sure to have better lighting next time though, promise!
Products used:
Urban Decay Urban Defense tinted moisturizer with SPF
elf contouring bronzer/blush palette
Clinique lipstick in "Beach Coral"
elf eyebrow kit
Everyday Minerals blush in "B&B"
wet n wild Natural Blend pressed powder
Blinc mascara
elf cream eyeliner in "Coffee"
Jesse Girl loose eyeshadow in "Sunset Blvd" (pink orange duochrome)
elf cream eyeshadow in "Candlelight"
elf cream eyeshadow in "Candlelight"
elf lip primer/plumper
elf conceal/highlight
Yep, I use a lot of elf studio products. There are so many great ones! I'll dedicate a post to it eventually.
This is a fun coral look! It's very simple to do; no complicated eyeshadow application.
First I apply the tinted moisturizer. For this I like to use my fingers (for heavier foundations I use a brush).
Next I dab on concealer. This one works better under the eyes but it's fine for evening out skin tone. If you have more blemishes, I'd recommend a heavier concealer. For under the eyes, apply it only to the dark areas.
I use my foundation brush or fingers to tap the concealer into the skin. Make sure you don't pull at the skin under the eyes. I use the side of the brush under the eyes but to cover spots, I use the tip to stipple the skin. The brush is a foundation brush by Sonia Kashuk.
Next I applied my powder to even out the skin tone and get rid of any shiny spots. You can do this at the end of your makeup (but before lips), if you prefer. This flat brush is by Mary Kay. A mineral powder works well here too, especially if you want more coverage.
Got to fill in my brows! It makes such a difference. I use the cream brown in the kit and the brush it comes with. It also has a powder but I never use that.
Now for some blush and bronzer using a Sonia Kashuk blush brush. I used the bronzer below my cheek bones to contour. It does have shimmer which normally you want to avoid with contouring but I find this one works fine. Start near your ear and follow that hollow below your cheek bone, first in a back and forth motion and then in small circles. Apply the blush to the apple of your cheek in circles then sweep it back along your cheek bone (it'll be above the bronzer/contouring shade) and lightly up your temple in a "C" shape.
Make sure this is all blended very well by going back over it with a clean brush. This is a Sonia Kashuk one.
Onto eyes! Apply your primer or you can skip it if you are using this eyeshadow because it doesn't budge. Apply "Candlelight" or another white based eyeshadow to your lid, up into the hollow/crease of your eyelid.
Take a small blending brush and blend that liner, bringing the excess down into your lower lash line. I love this brush; so precise!
Before we finish our eyes, let's prep our lips. Outline your lips with a concealer. It's okay if it's a bit lighter than your skin, just make sure to blend it very well. You may want to go back over it with your powder. You can also apply a balm or lip plumper.
I'm using this elf brush to apply the eyeshadow dry, first, to the eyelid up to the crease. This application will be more subtle.
Now I'm taking another elf brush, a smaller blending brush. I got the brush damp before dipping it in the eyeshadow. I applied this over the first coat of eyeshadow, focusing it more on the outer edges. This will apply much more opaque so add as little or as much as you want!
Now take a highlighter (I LOVE this elf one) and add it to the areas of your face you want to highlight ie areas the light would naturally hit. I like to add it beneath my brown bone (outer part only), corner of my eyes, cheek bones (in a "C" shape from the brow), bridge of my nose and above my upper lip/cupids bow. Blend this with your finger, making sure there are no harsh lines.
Lips! You want your lips to be soft but not wet, sticky or slick. If there is still a lot of balm on them, gently remove it (kiss the back of your hand or a piece of toilet paper). Now apply your coral lipstick. "Beach Coral" is easy to apply right onto the lips, no brush required.
Apply your mascara and you're done!


0 comments:
Post a Comment
I appreciate every comment I receive so if you're leaving one right now, thank you!! <3